Customer Segmentation is one of Magento's most powerful ways to market to and target specific audiences.
By using conditions to separate customers into different segments, merchants can market to targeted customers instead of the masses.
Some ways you can segment your customers include address, order history, and shopping cart contents. Because customer information is constantly refreshed, customers can be associated and disassociated from a segment as they shop. You can also optimize marketing initiatives based on targeted segments with shopping cart price rules and generate reports as needed.
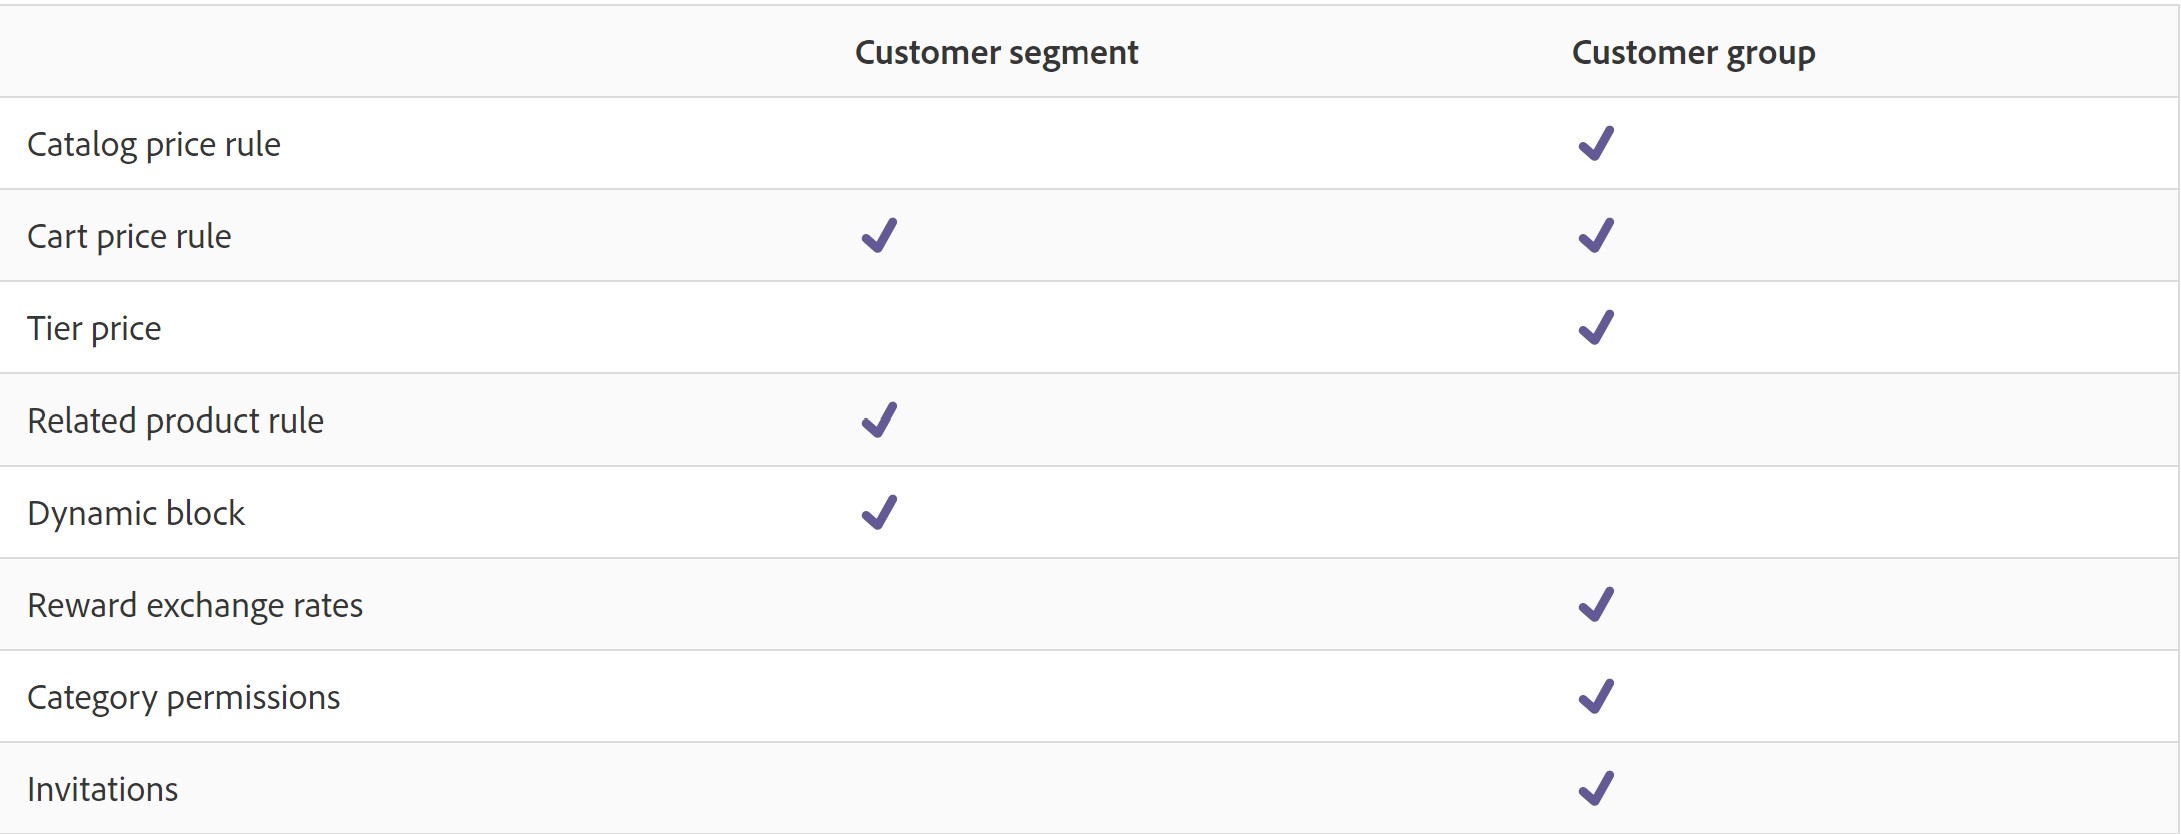
Customer segments are not the same as customer groups, (Customer groups will require you to input the customers that you want in that group while customer segments will try and 'match' users to that group) to better understand the difference we can look at where they are used.
Setting Up Customer Segments:
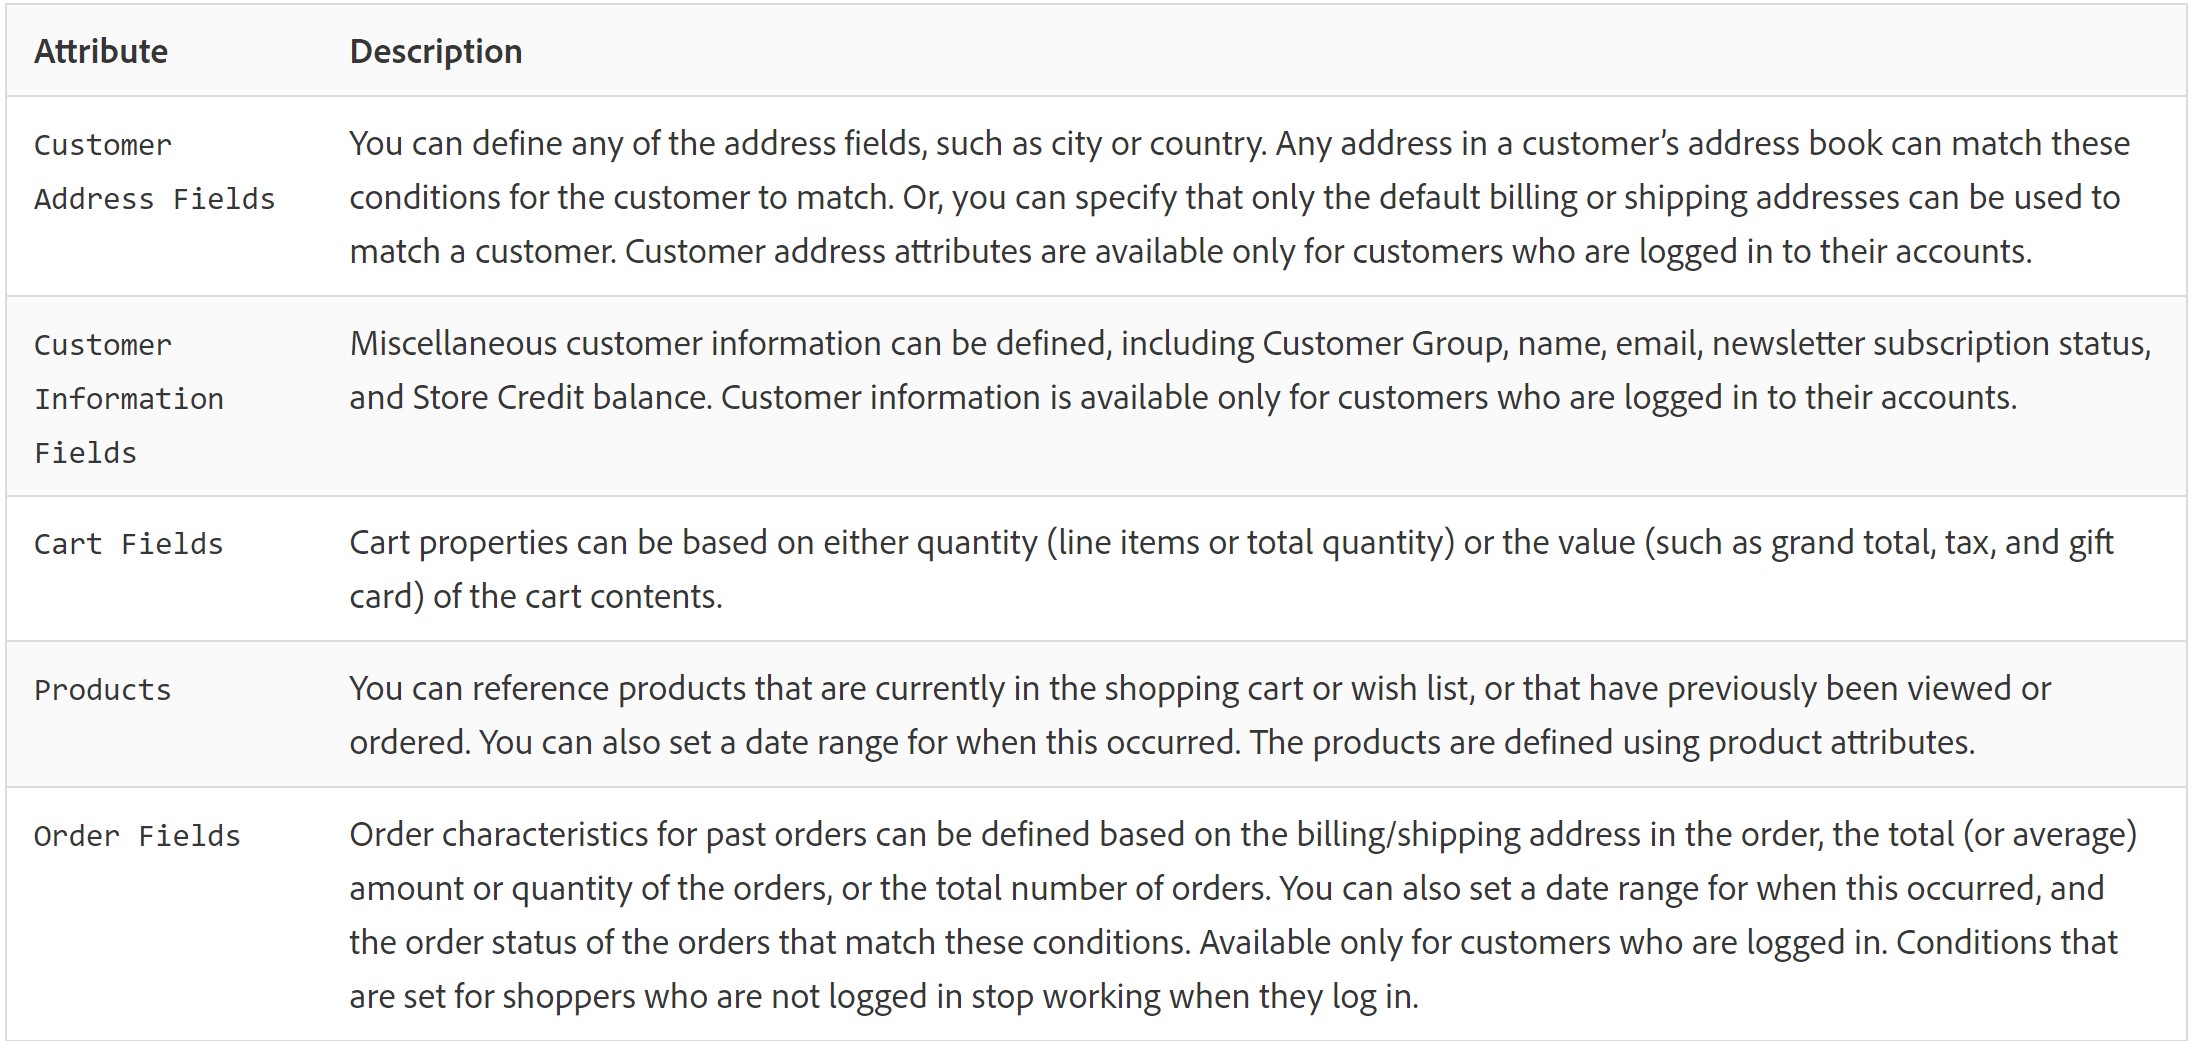
Creating customer segments is similar to building a cart price rule, except that the options include customer segment-specific attributes. These attributes include Customer Address Fields, Customer Information Fields, Cart Fields, Products, and Other Fields.
In order to utilize the fields, you will need to verify that the Customer Segment functionality is enabled on your site. To do that, go to the "Stores" tab on the Admin sidebar, and under settings select "Configuration." On that page scroll down and under "Customer Segments" make sure the "Enable Customer Segment Functionality" field is set to "Yes."
Once you have verified that the functionality is enabled, you can start creating customer segments.
Creating Customer Segments:
To create customer segments, select "Customers" in the Admin sidebar, then select "Segments." Once inside the segments page, select "Add Segment" in the upper-right corner.
You'll be taken to a creation screen where you can enter a name to identify the segment, for example, females living in LA. You can also add a brief description of the segment and what it will be used for.
Next, select which site (if you have multiple) you want the customer segment to be used on. Set the status to "Active" and select the customer types you want to use in the segment from the stated options.:

Once you have completed filling out the fields, click "Save and Continue Edit." Once you save the descriptions, you will set up the conditions.
On the left-side panel, select "Conditions." Once on the conditions screen, select the green plus sign to start adding your conditions. From our example above, you would select "Gender" from the list of conditions that display after hitting the green plus, (make sure to leave the default "is" as the condition control option) and select female. Continue adding conditions until you are satisfied with the segment.
For females living in LA the completed conditions should look like the image below.

When you are satisfied with your conditions, click "Save and Continue Edit."
In the left panel, click "Matched Customers: to display all the customers who match the conditions you have set.
It's always a good idea to periodically review the list of matched customers that are generated to be sure the correct segment of customers is being pulled.
If the list of customers meets your goal, click “Save” to complete the customer segment. If the list does not meet your goal, go back to the conditions and edit until the list of customers meets your goal.
Once your segment and conditions are saved you can use the customer segment for targeted promotions, content, and mailing.
Deleting Customer Segments:
Removing an existing customer segment is easy.
From the Admin sidebar select “Customers,” and then “Segments.” Select the segment you want to delete. Then in the menu bar, click the “Delete” button. You will need to confirm the action by clicking “OK.”
Once you confirm, the segment will be deleted.
For more information on Adobe Commerce's functionality check out our other deep dives, Return Merchandise Authorizations (RMAs), and Rule-Based Product Relations. Follow along as we look at Rewards and Automated Email Reminders.
