In the comparison blogs we have been cultivating around major eCommerce platforms Magento's superior functionality has been mentioned more than once. But what does that really mean and why is it important?
Let's take an in-depth look at Magento's Functionality. In this blog, we will look at Return Merchandise Authorization or RMAs.
Adobe Commerce powered by Magento allows both the Admin and the customer to create RMAs. Creating RMAs is the first step in the item return process; the customer (through the front-end, depending on site permissions) or the Admin (through the Magento Admin Panel) can create RMAs for the site owner to authorize.
Utilizing RMAs keeps Adobe Commerce orders and inventory in sync through the item return process.
Once this setup is complete, the return process is relatively straightforward and allows for either the Admin or customer to request a return for the site owner to accept or deny.
If you decide to allow Customer-Generated RMAs you will need to complete the setup process.
Setting Up Customer-Generated RMAs:
To enable RMAs on your storefront you will navigate to the Admin sidebar and go to Stores> Settings> Configuration. Then, in the left panel, expand Sales and choose Invoices underneath. Then expand the RMA Settings section.
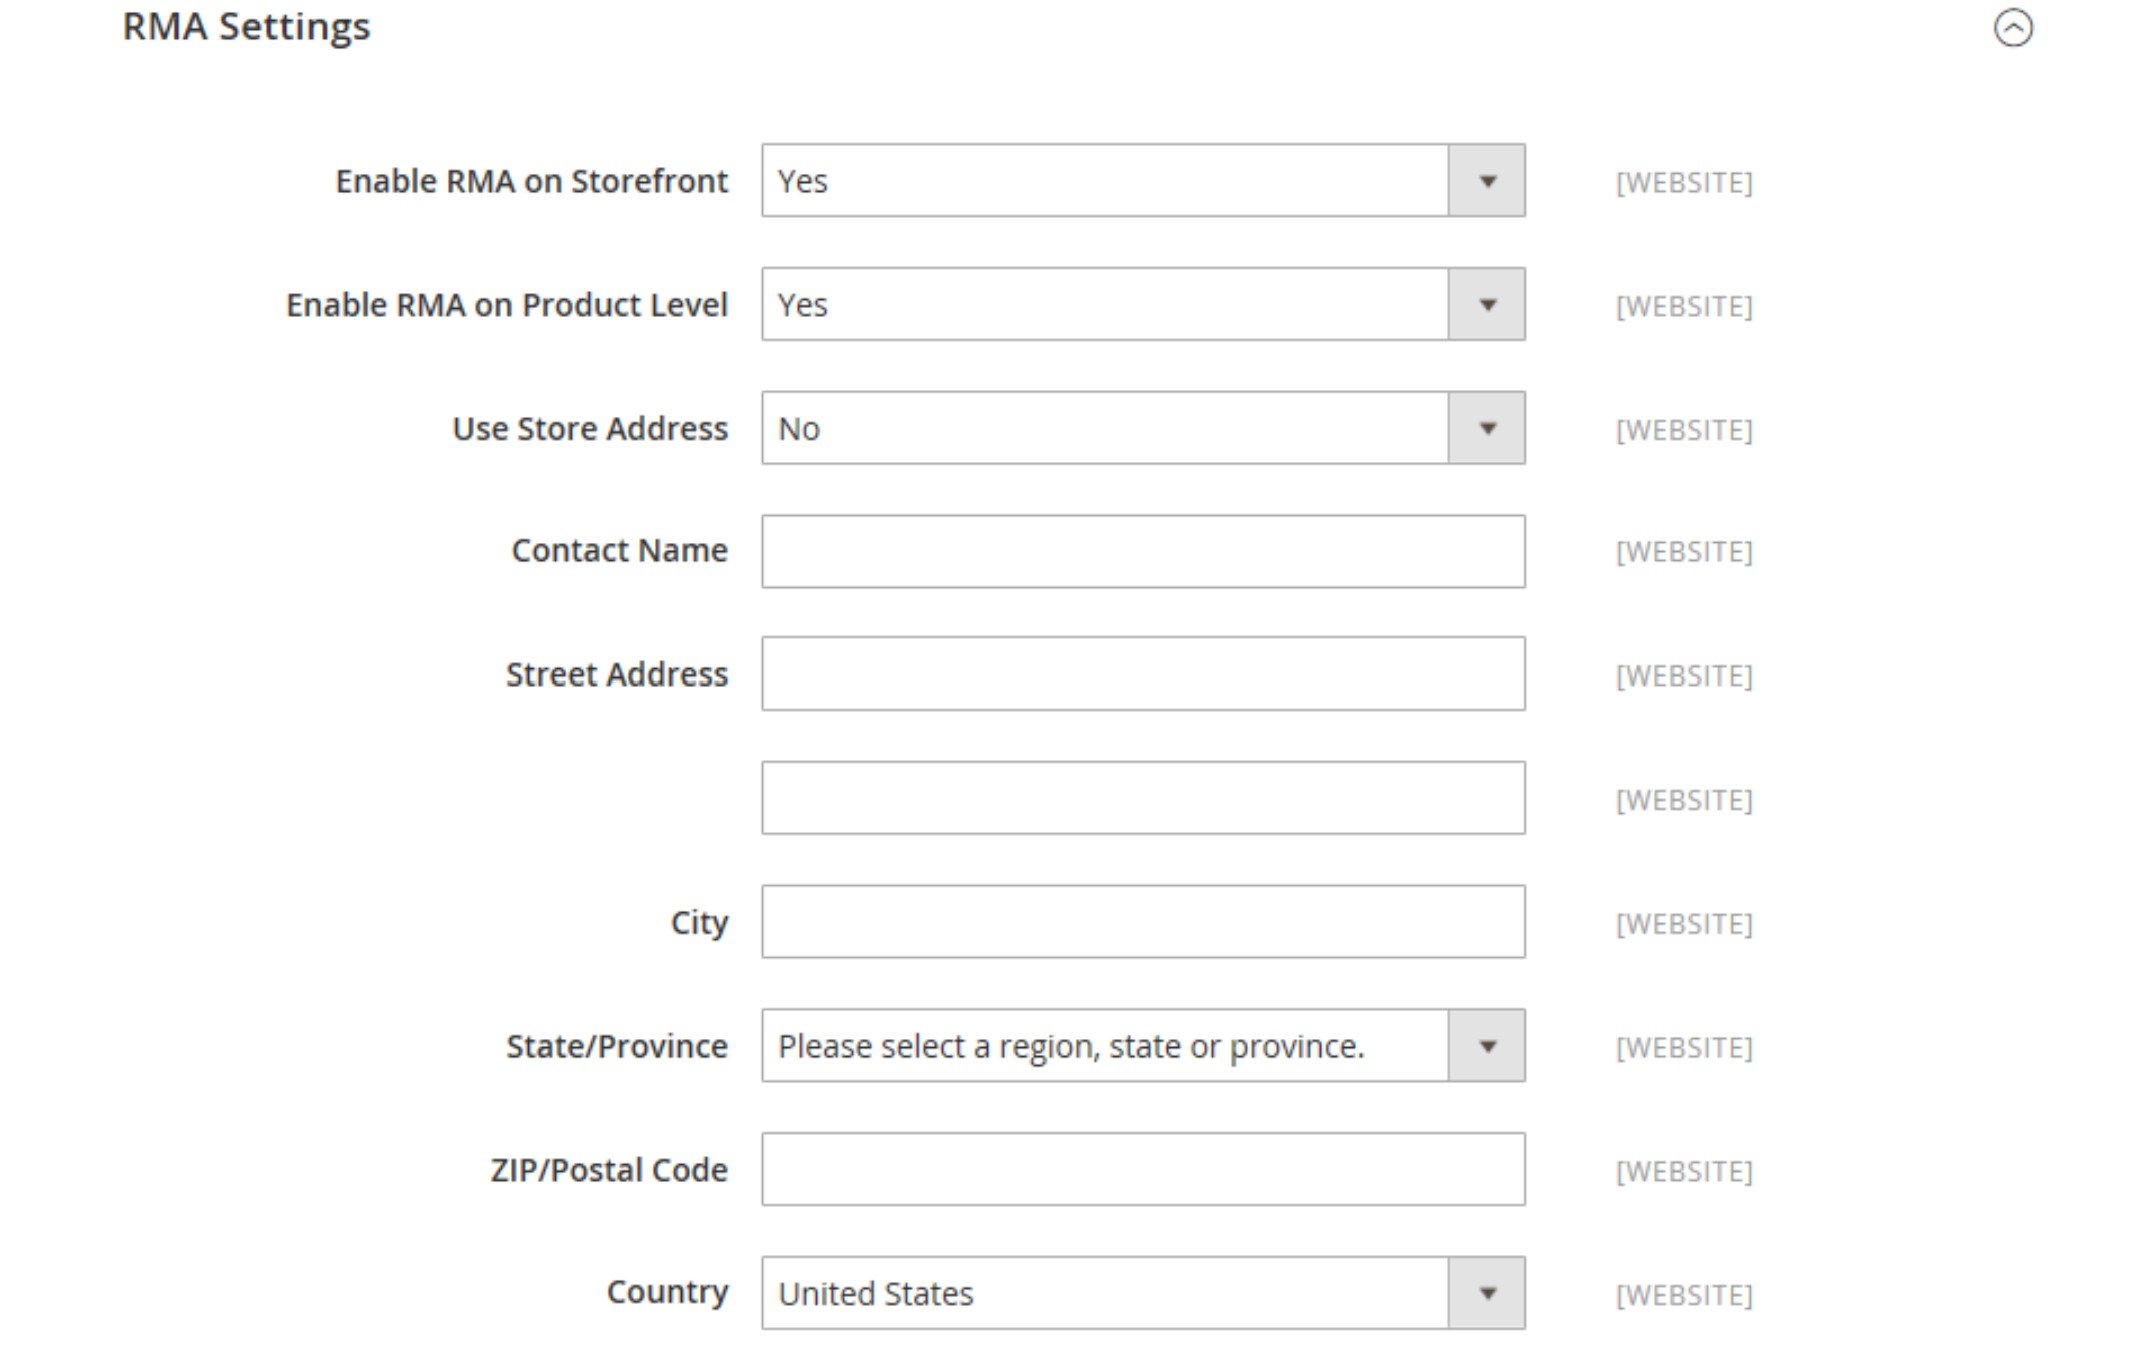
When enabled with a "yes" in both the Enable RMA on Storefront and Enable RMA on Product level customers can submit RMA requests from your storefront.
After enabling customer-generated RMAs the next setup step is configuring the return attributes. The returns attributes are used to store information that is needed during the product return process. The default attributes include the condition of the returned product, the reason for the return, and a field that indicates how the return was resolved.
You are able to add additional attributes if wanted.
To do so, go to the Admin sidebar, and go to Stores> Attributes> Returns. Then in the upper-right corner, select Add New Attribute. You will fill out the form to set all attribute guidelines.
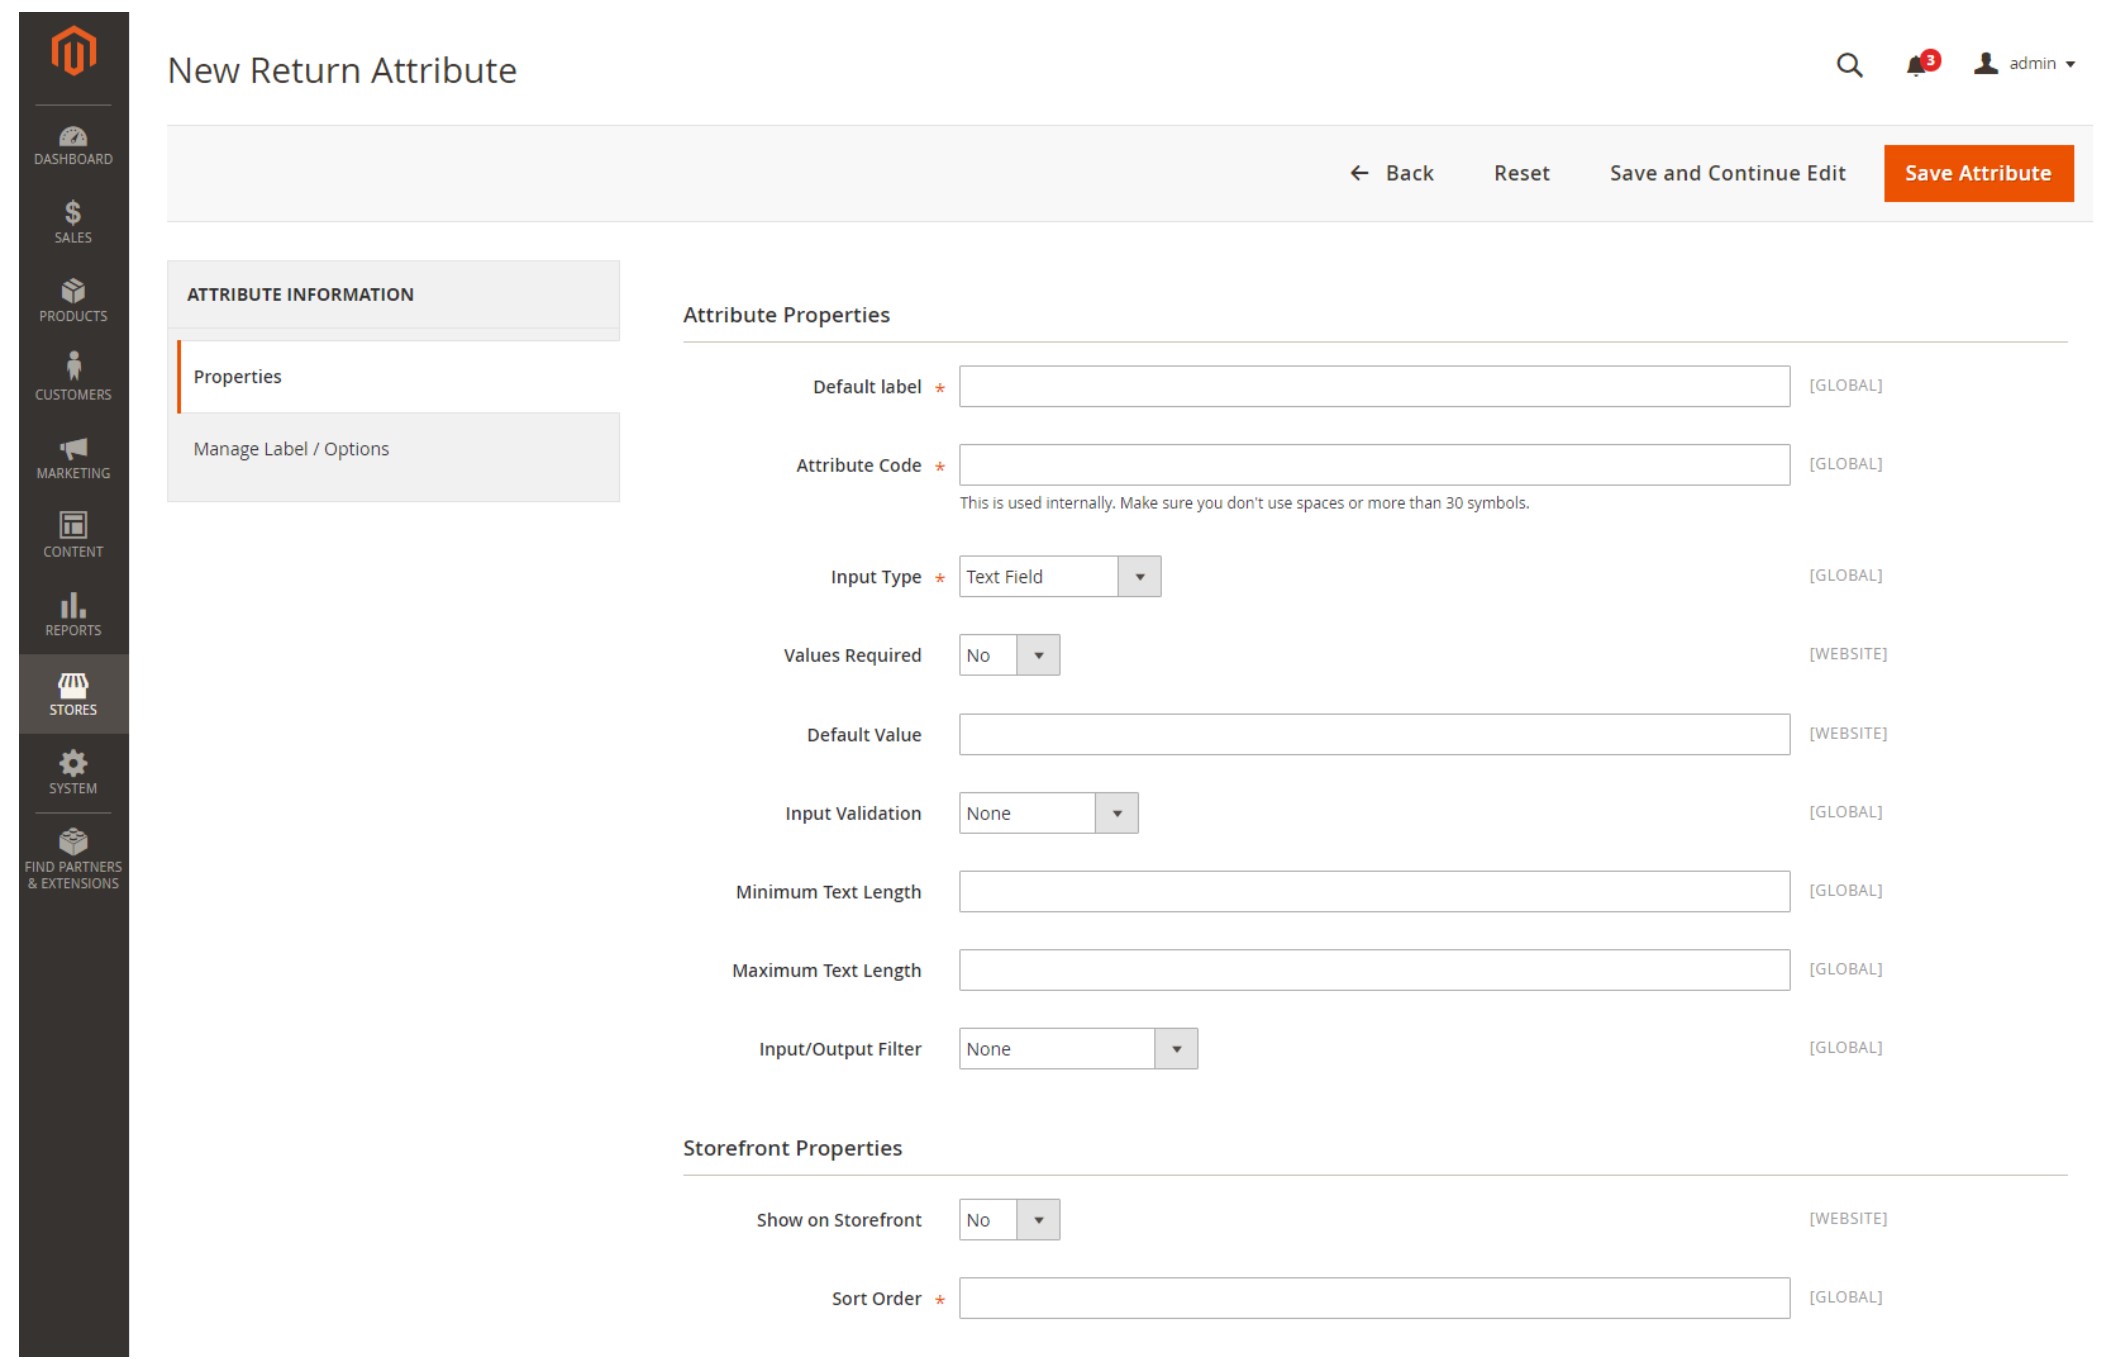
When the attributes are set, your site is ready for customer-generated RMAs.
Customer-Generated RMAs:
If you'd like your customers to be able to create their own RMA, Adobe Commerce allows you to add an Orders and Returns button in the footer. Then the customer will enter the order information.
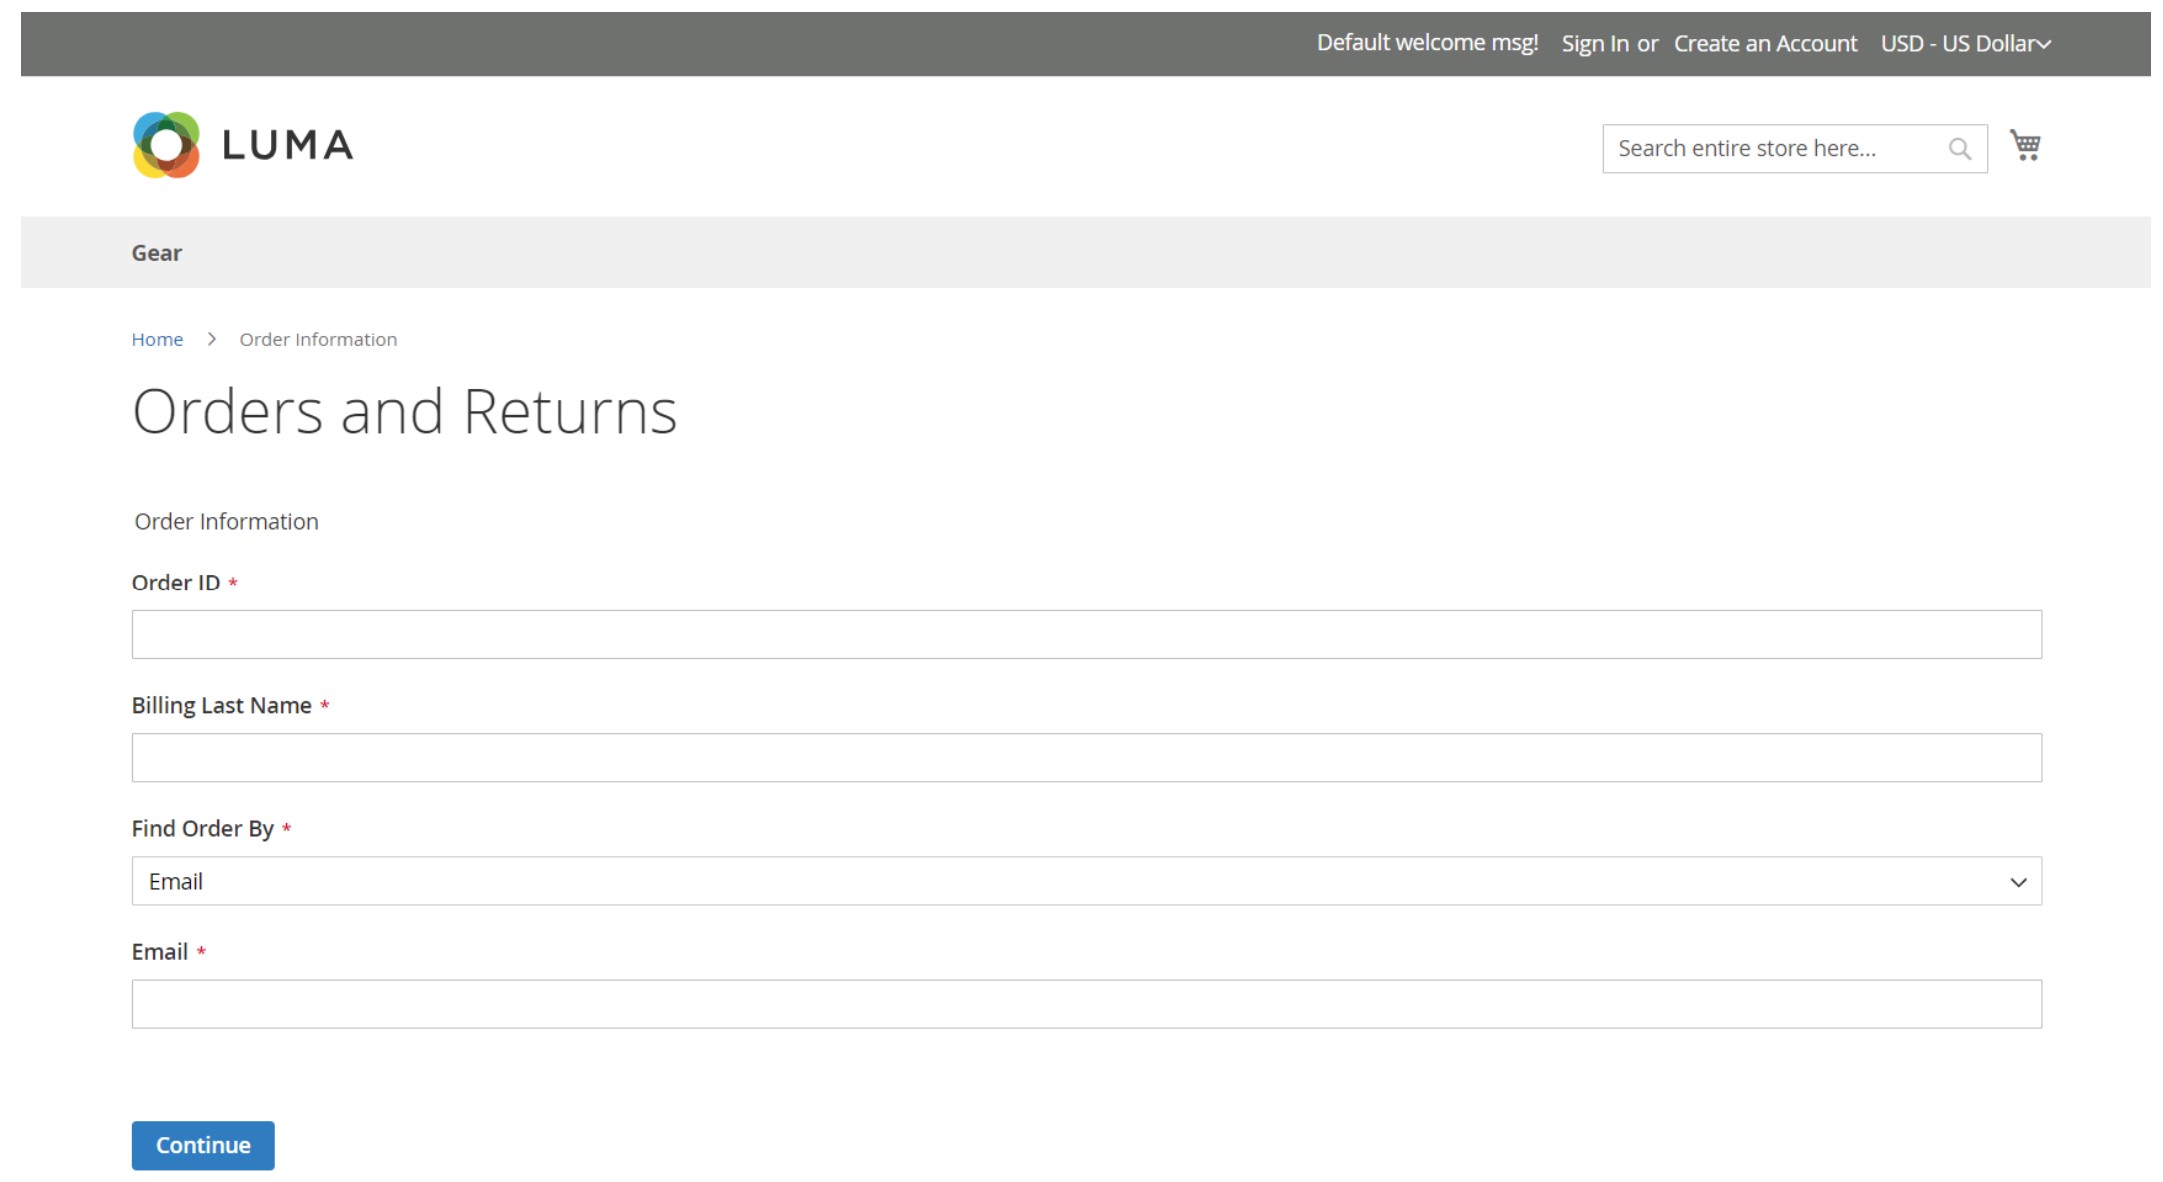
After clicking the continue button the customer will be able to view their order and select return.
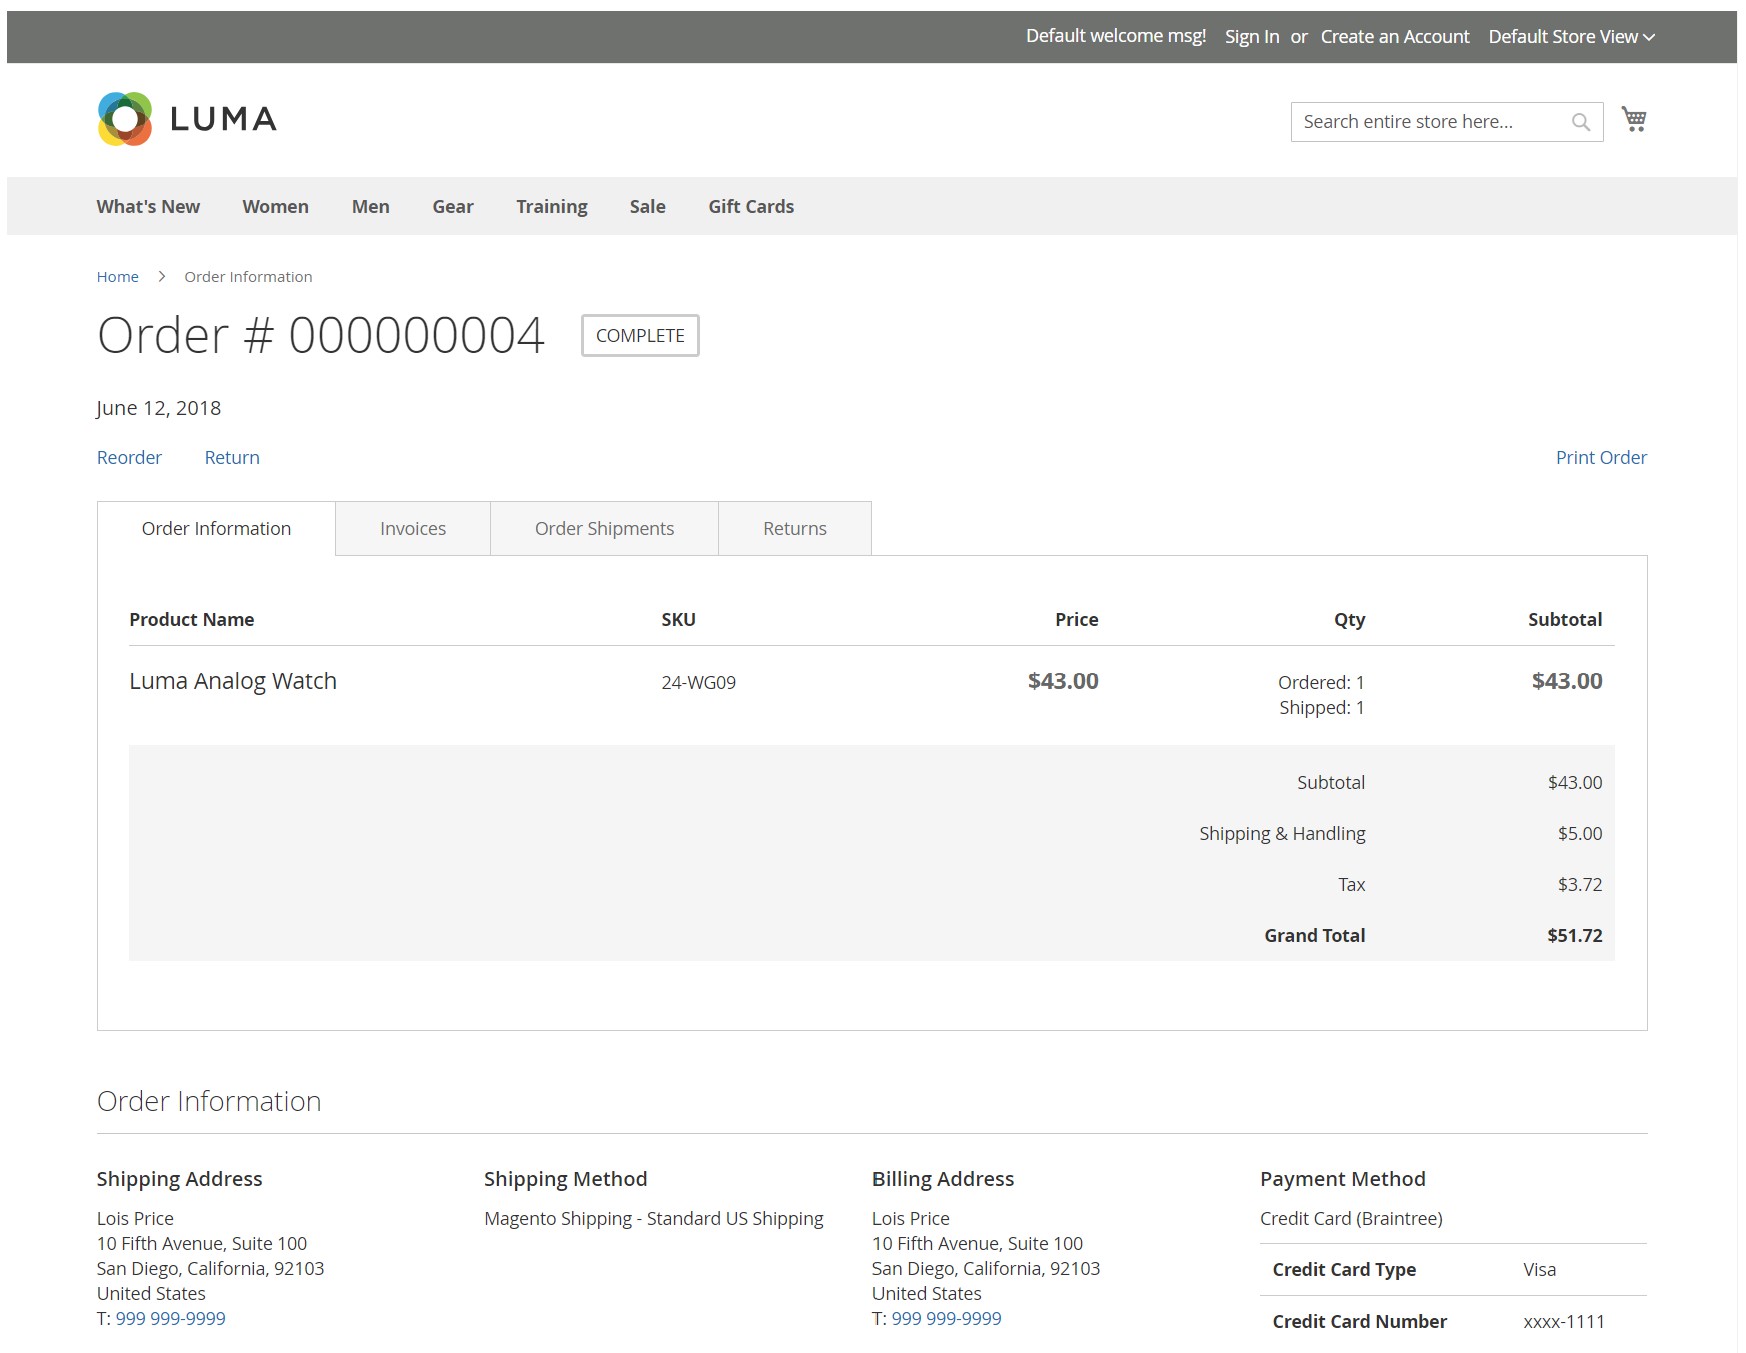
The customer will be prompted to fill out a form like the one below, describing the items, quantities, resolution, item condition, and reason for return.
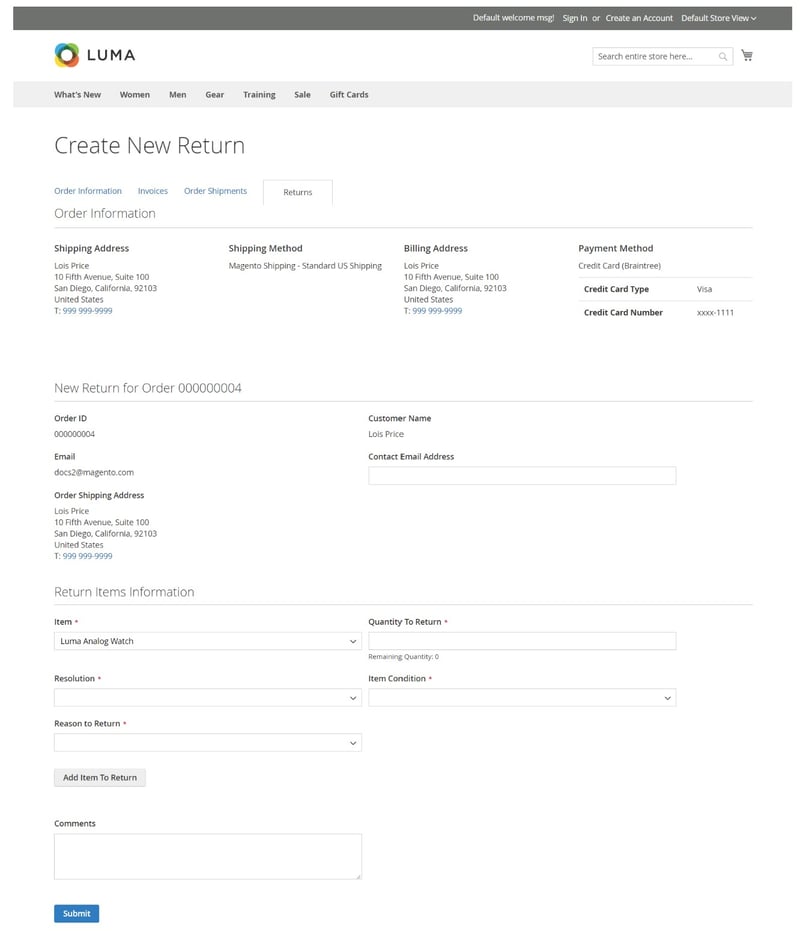
Once completed, the customer submits the form to be accepted or denied by the site owner. The return status will be "pending" until the site owner makes a decision to accept or deny the RMA.
Admin Created RMAs:
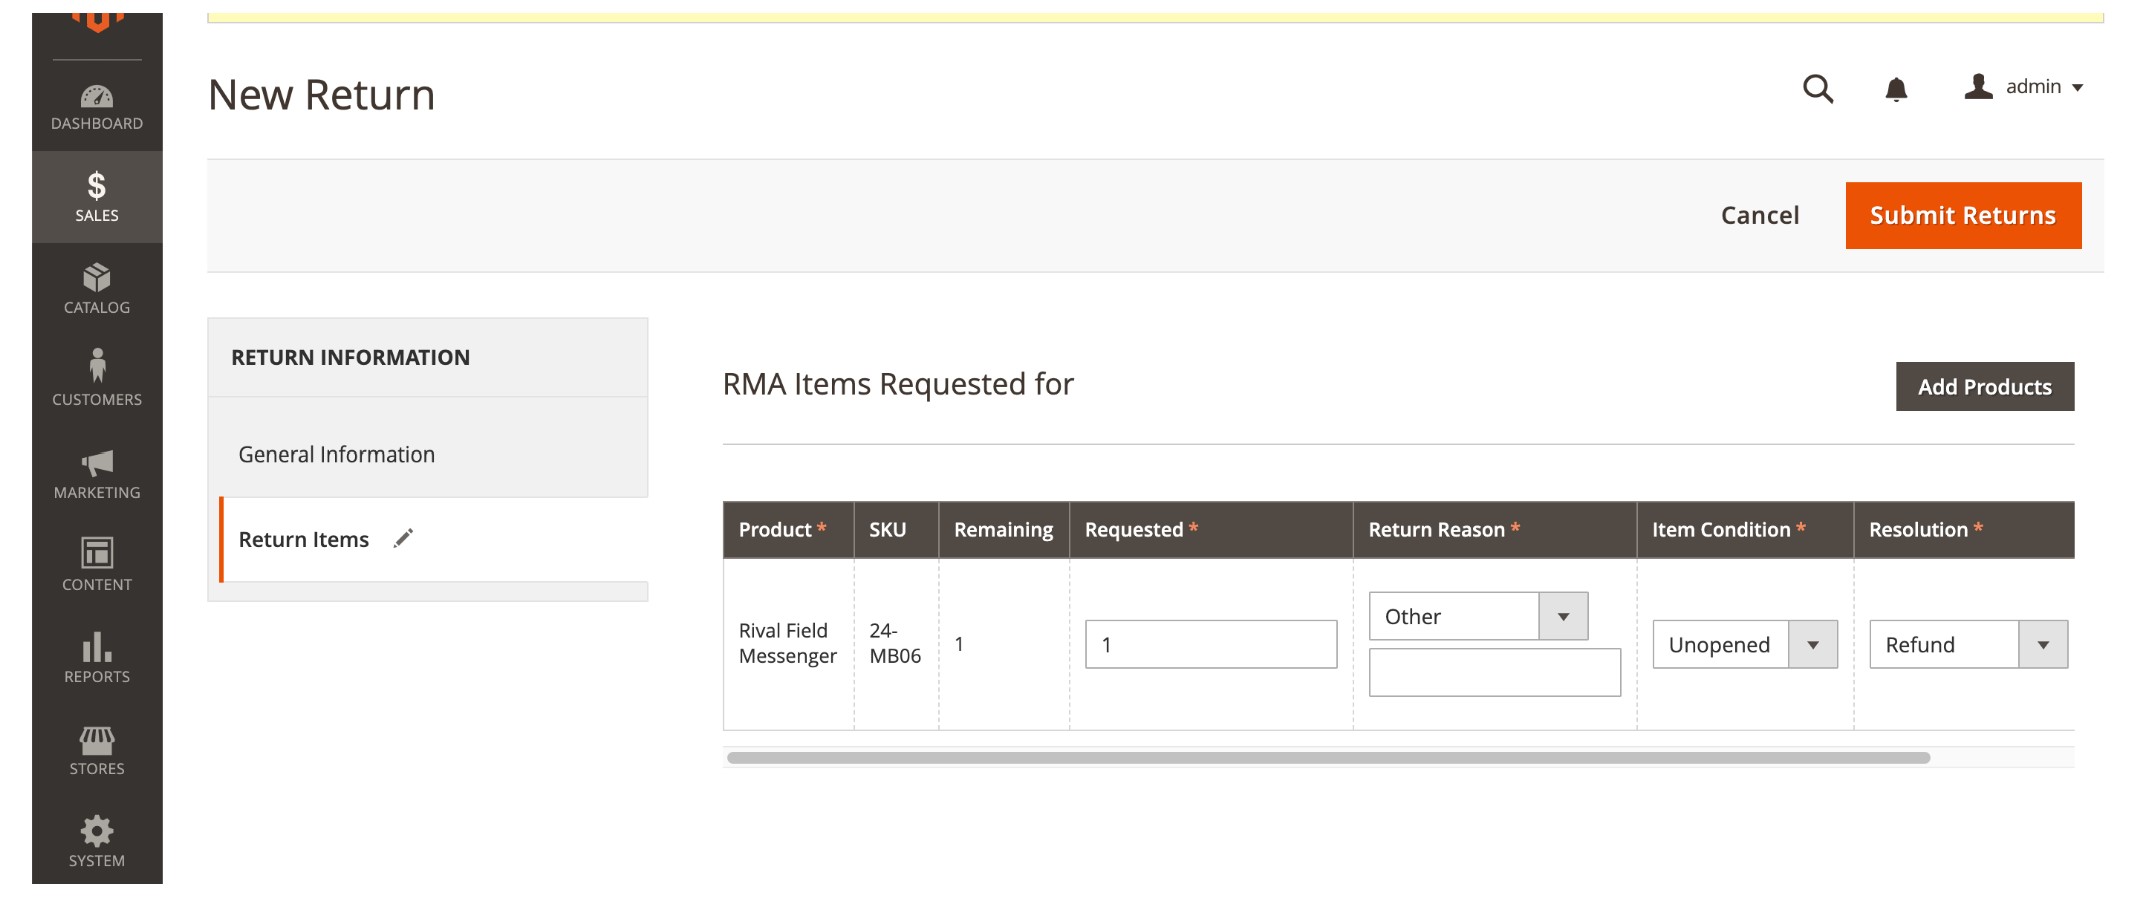
To create an RMA from the admin panel, you navigate to Sales, then Returns. Select New Return Request. Click the order for return (it must have a complete status). Under the Return Information section. select the Return Items tab.
Add the items you want to return by selecting Add Items. Click the checkbox for each product that will be returned and click Add Selected Products to Returns.
For Requested, enter the number of items to be returned.
Then set the Return Reason; you can select: Wrong Color, Wrong Size, Out of Service, and Other. If the reason for the return is different from those lists you can enter your own if you select the other option.
You can then set the Item Condition to Unopened, Opened, or Damaged.
Then set the Resolution. You can select from Exchange, Refund, or Store Credit.
Finally create the RMA by selecting Submit Returns.
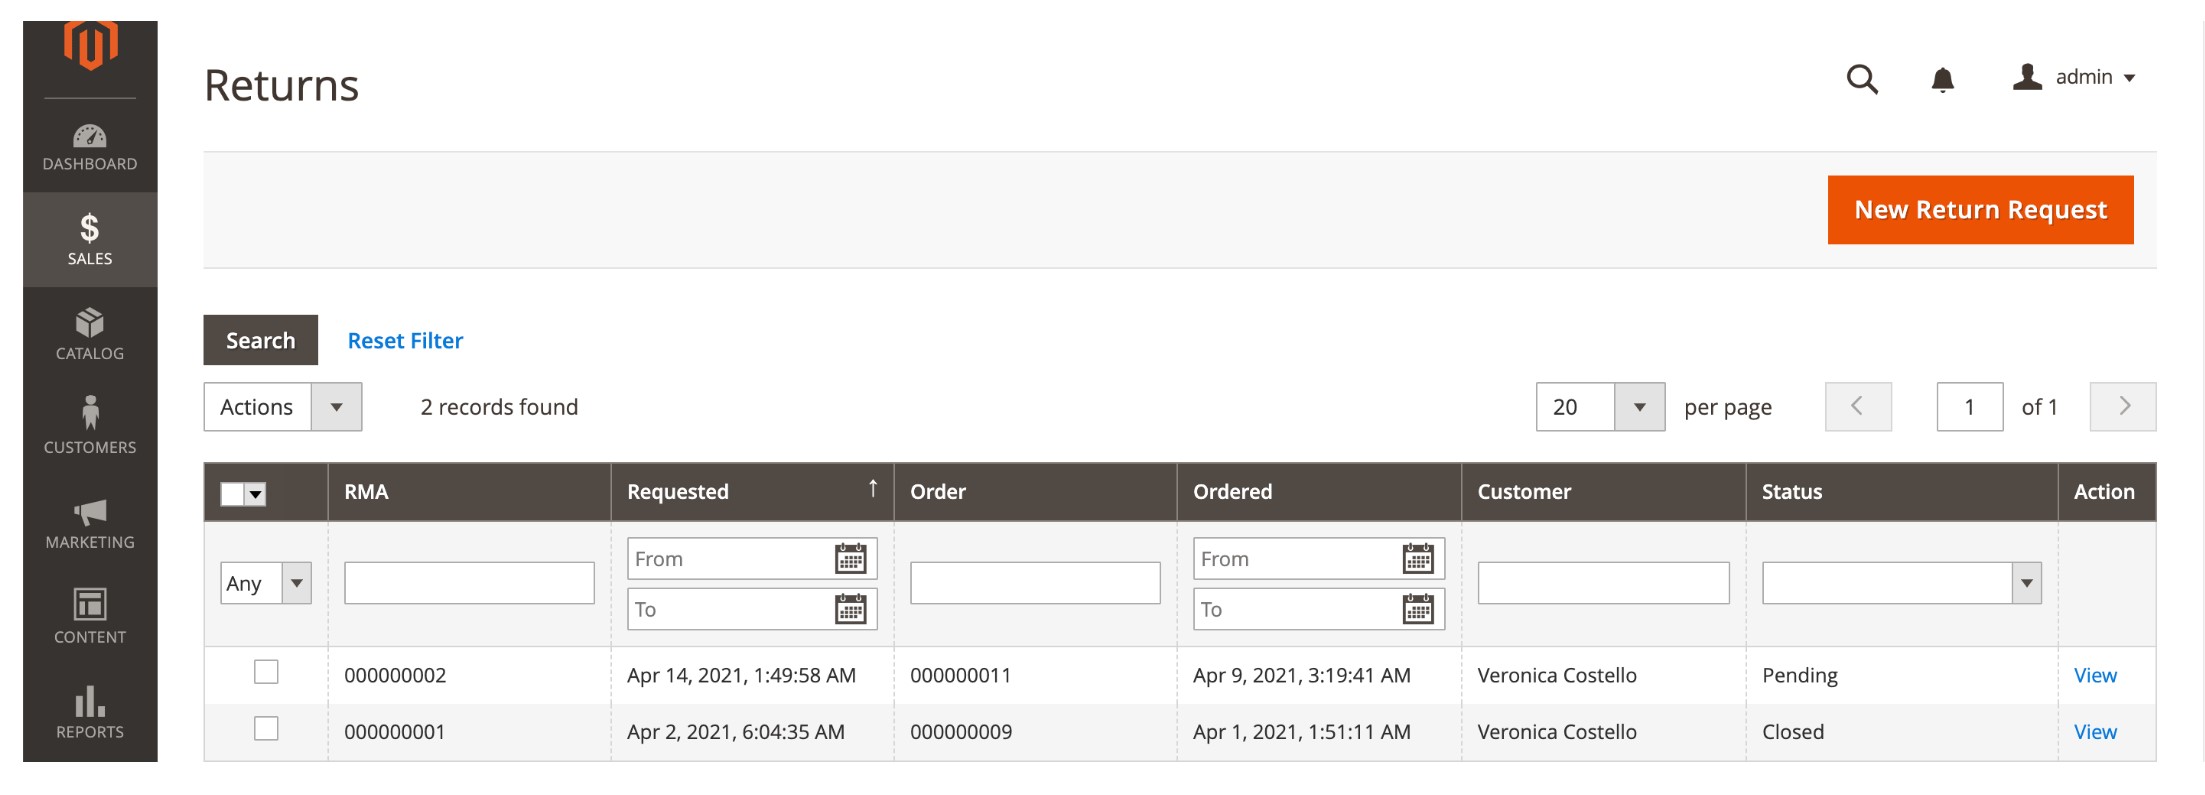
Once a request is submitted, by a customer or the Admin, it must be authorized. Any submitted RMA appears on the Returns page with a Pending Status.
Authorization:
For each item in the RMA, the Admin needs to select a new status and either authorize or deny the return. If authorized, an authorized quantity needs to be provided as well. Once the status is updated the Admin will click save.
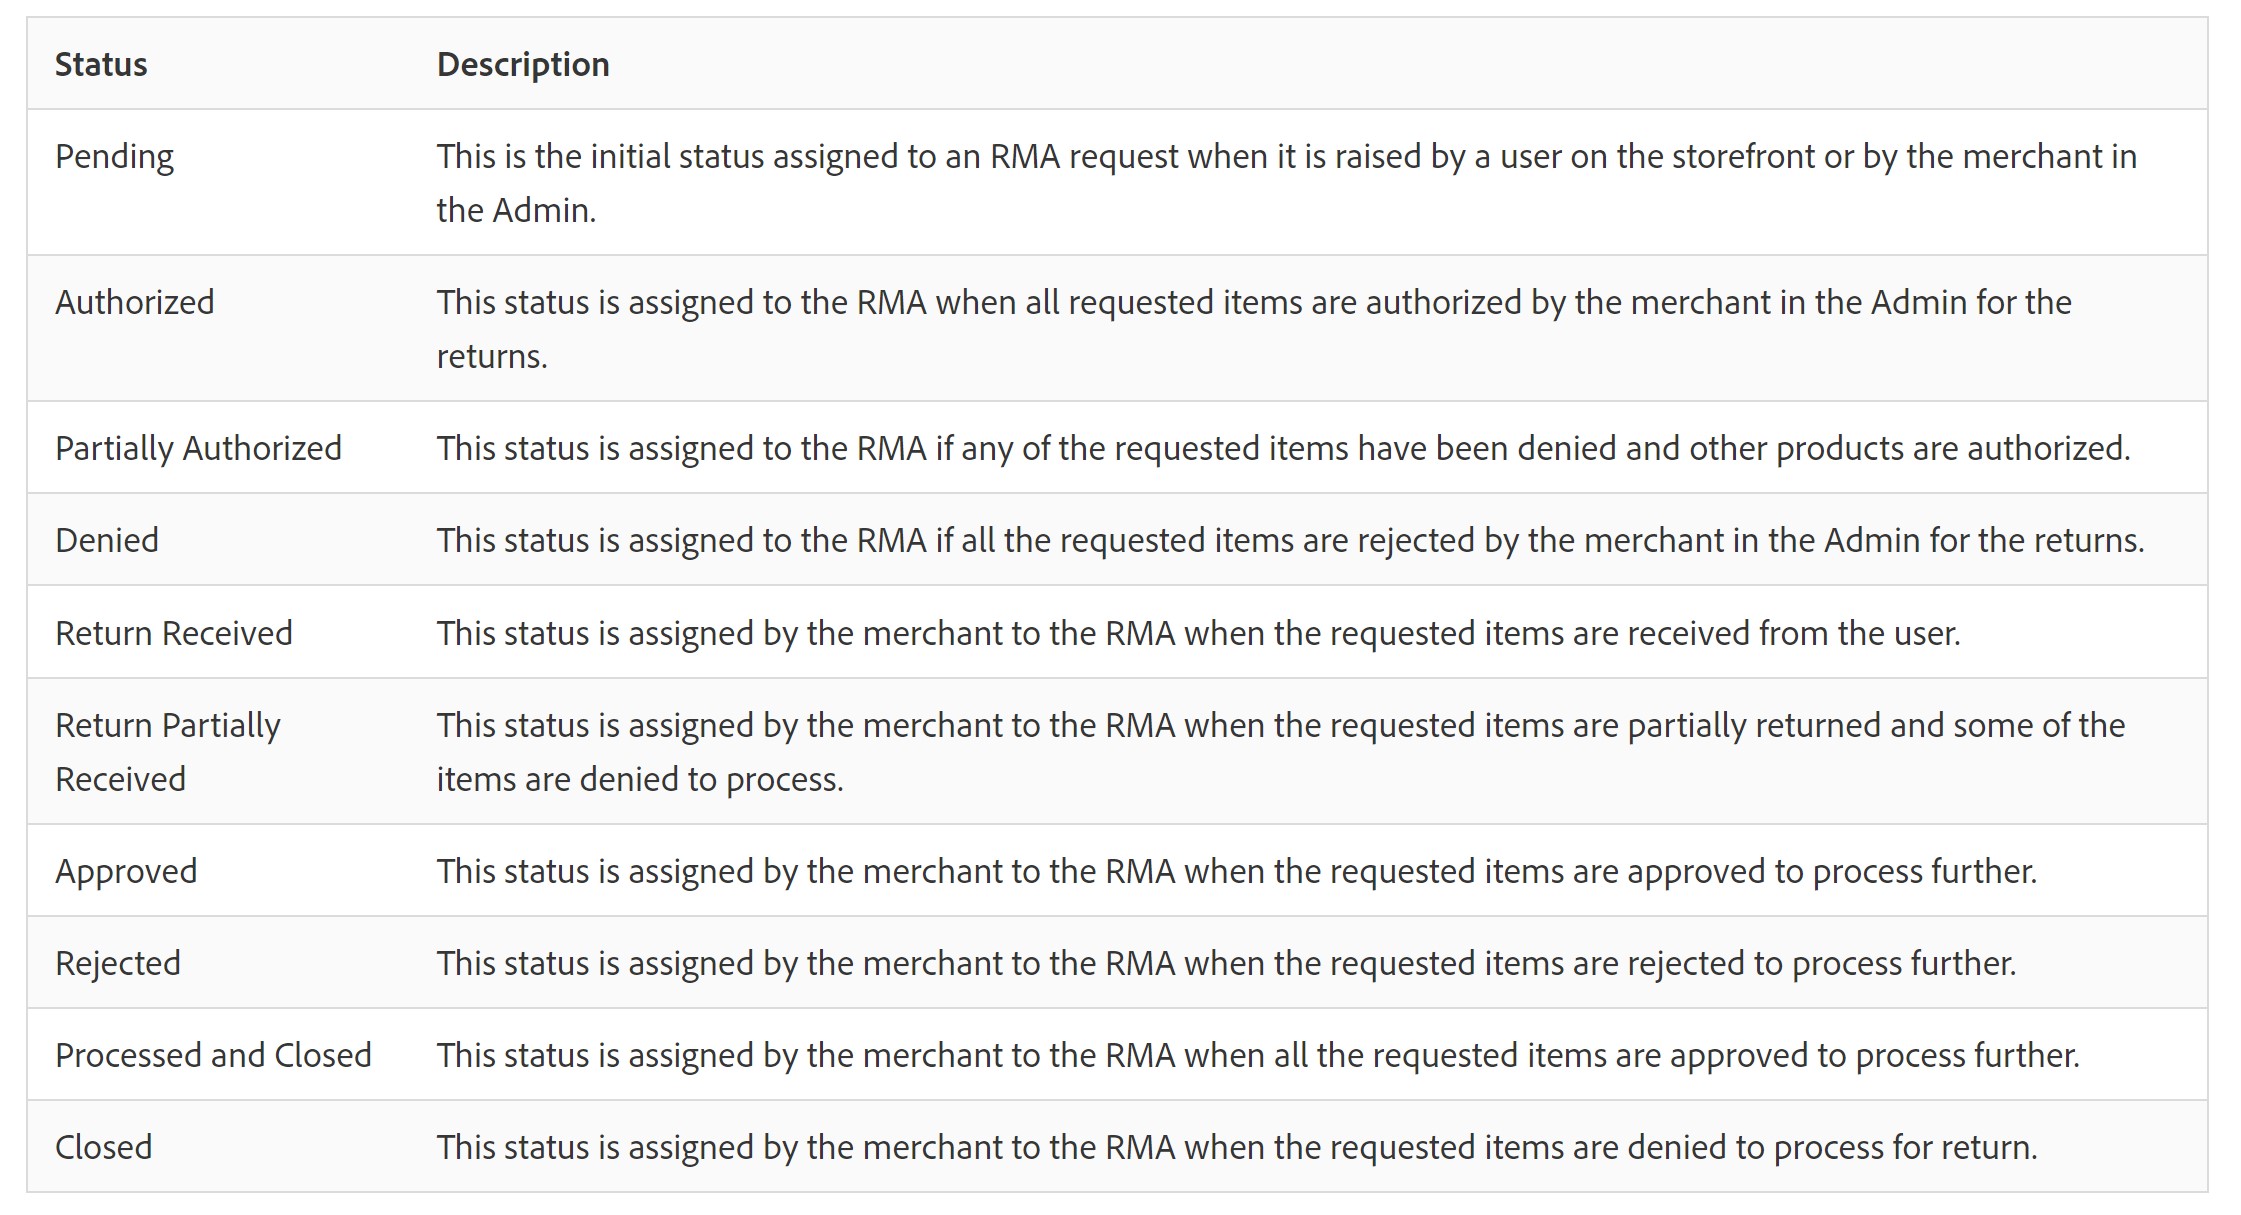
RMAs can have the following statuses:
If authorized, the user has the option to create a shipping label after which they will need to go through the process of issuing a credit or refund or replacing the item.
If the RMA is denied, no further action needs to be taken.
We will be diving into other Magento functionalities including Rule-Based Product Relations, Segmentation, Rewards, and Automated Email Reminders. Be sure to follow along to fully understand how Adobe Commerce's functionality can improve your eCommerce site.
